Calendars and Events
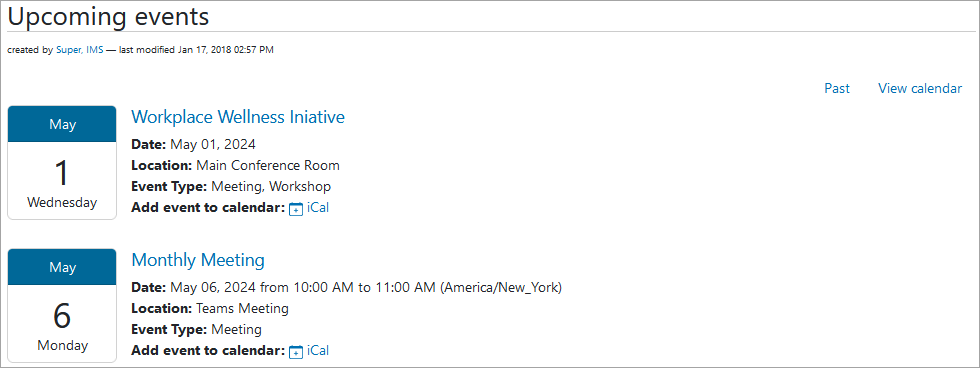
To view the events of a portal, click the Events folder in the navigation pane. Events can be added to any folder on a portal, but the Events folder displays all of the events regardless of where they are added.
For portal users' convenience, an Events portlet highlighting up to five future events is provided on the right side of the Home page.
Displays for Events
- List of events – This display lists the upcoming events in chronological order, from earliest to latest. To view past events, click the Past link in the top right corner of the Events page.

- Full-page monthly calendar – Select the View calendar link in the top right corner of the Events page. This view can display the events by month, week, or day. The default setting is the current month, but a future or past month/week/day can be selected using the left or right arrow located in the top left corner of the calendar. Event types are color-coded and a legend of the color-type indicator is shown above the calendar.

Add/Edit Events
Each event has its own record of information such as event type, start/end dates and times, location, attendees, contact information, URL, and more. To add a new event, select Add new > Event from the toolbar to open the Add Event form. Complete the following fields on the form:

- Title – The title is required and is displayed as the heading of the event page, in the URL, and in the list of search results.
- Summary – A short description of the event, and although optional, it is useful because it appears in the events list and search results.
- Event Type – Select the applicable event type(s). Only the Site Administrator can edit the Event Type list.
- Event Starts, Event Ends – Enter the start and end dates, and the times for the event (the default values are the current date and time). The time zone is Eastern Standard Time (EST) due to the location of IMS web servers.
- For whole day events or events without a definite end time, check the box Whole Day or Open End to skip the time selection.
- One time zone is set for the portals and all times entered use that time zone.
- Recurrence – For recurring events, click the Add button, provide the appropriate information on the Repeat form, and review the list of Selected dates for correctness. Click Save when finished to get back to the Add Event form. If the Add button was inadvertently clicked, exit the Repeat form by clicking X in the top right corner or Cancel in the bottom right corner of the form. To modify a recurrence, click the Edit button. The Repeat on field needs to be selected again when editing a recurring event. Additional dates can be removed from or added to the Selected dates section.
- Location – Enter the event location if necessary.
- Attendees – Enter the event attendees if necessary.
- Contact Name, Contact E-mail, and Contact Phone – Enter the name, email and phone number of the contact person for the event if necessary.
- Event URL – Enter the URL of a website that is associated with the event.
- Text – Use this event body text field to enter additional information such as meeting agenda, registration instructions, etc. The content in this field can be formatted using the content editor toolbar at the top of the section. See Add a Page for more information on formatting text, images and links within this field.
- Additional settings –
- Related Items – Click the Categorization tab at the top of the Add Event form to link related contents within the portal to the event. Linked contents could be presentation materials, agendas, minutes from previous events, or any other content on the site.
- Allow discussion – Click the Settings tab at the top of the Add Event form and select "Yes" in the Allow discussion field to allow users to post threaded messages.
Once the necessary fields are completed, click Save. Review how the event is presented on calendar and list views, and then publish the event.
Save an Event to a Personal Calendar
Use the iCal links on the Events folder listing or the individual event page to download an event to a personal computer. The downloaded ics file can be added to a personal calendar running on a program such as MS Outlook.
Event Type Settings
Site Administrators can edit the list of event types for a portal. The available standard event types are Conference Call, Convention, Lecture, Meeting, Seminar, Video Conference, Webinar, and Workshop. To tailor this list to a specific project or study:
- Go to Site Setup.
- Click Event Settings in the Add-on Configuration section.
- On the Events Settings form, remove from or add to the list of event types, allowing one type per line.

- Refer to the Color Coding section to preview how the events are color coded in calendar view. There are 8 unique colors and they are automatically assigned by the system. All event types beyond 8 are coded olive-brown. There is one additional type visible only in calendar view, "Other", and it is coded grey.
- Save all changes.
