Add New Users
Register a New User
To add or register a user to a portal:
- Go to Users under Site Setup.
- On the Users table, click + Add New User.

- Enter the Email, First Name, and Last Name of the new user.

- In the Add to the following groups section, assign group(s) to the new user if necessary.
Note: The number of Site Administrators should be limited because it is a powerful permission. Site Administrators can add users and groups, change portal settings, and add/edit/delete content.
- Click Register. The new user is now added to the Users table with the status "(This account is not linked) - 30 days until removal", which remains until the user has linked to the portal (Step 2 of the registration email) or the 30 days limit has passed and the account is automatically deleted.
- After clicking Register, a registration email is sent to the user with instructions to activate the new account. The email includes:
- The email address of the newly registered user.
- The name of the portal or website.
- A list of the login options the user can use to sign in to the site.
- Step 1: A link to create a Login.gov account if the user does not have one of the login accounts listed.
- Step 2: A link to connect/link the user's login account to the portal.

Note: The user has 7 days to activate the portal account, after which the activation link expires and the user must contact the Site Administrator for reactivation. The Site Administrator can use the Re-register feature to send a new registration email to the user.
Register Multiple New Users
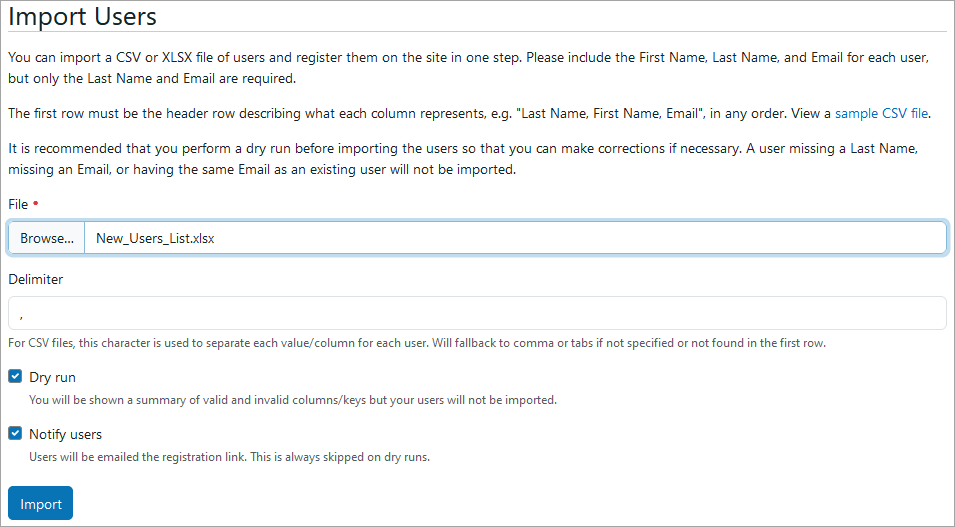
Multiple users can be added to a portal in one step via a CSV or XLSX file import. To add or register multiple users to a portal:
- Go to Users under Site Setup.
- On the Users table, click Import Multiple Users.


- It is recommended to perform a dry run and review the run report before making an actual import. Leave the Dry run checkbox checked and click Import.

- The dry run report shows which columns will be imported and which ignored. It also shows users missing a last name, missing an email address, or already added to the portal (matched by email addresses). Make any correction necessary, uncheck the Dry run checkbox, and click Import.
- All users in the CSV or XLSX file are now added to the Users table with the status "(This account is not linked) - 30 days until removal", which remains for each user until they link their login account to the portal (Step 2 of the registration email) or the 30 days limit has passed and the account is automatically deleted.
- If the Notify users checkbox (see Step 3 image) is checked, a registration email is sent to each user with instructions to activate the new account (see Step 6 in Register a New User section above for details of the registration email).
Refer to the User Registration Frequently Asked Questions for more information.
